KVM Hypervisor
Virtual HMC Appliance supports KVM on:
- Ubuntu 14.04 LTS
- Red Hat Enterprise Linux 6.7 and above
Note: The following packages are required: Qemu-KVM, Libvirt-daemon-kvm, Libguestfs-tools-c.
HMC Virtual appliance supports KVM version 1.5.3 or later.
- Create a folder to store Virtual HMC Components.
- Copy the Virtual HMC Tar file into the folder.
- Extract the Virtual HMC file into the folder.
- The following files should be displayed:
- README.txt
- vHMC-Conf.xml
- disk1.img
- checksum
- domain.xml
- Open domain.xml with a text editor
- Edit the following values:
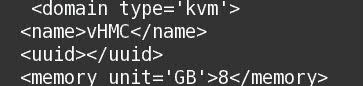
- Change the name of the Virtual HMC(Optional)
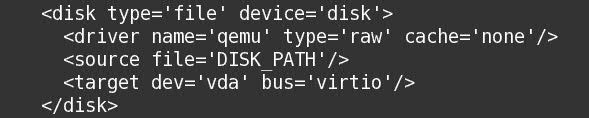
- Replace DISK_PATH with the path for disk1.img
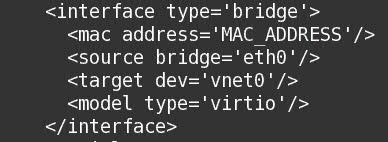
- Replace MAC_ADDRESS with a MAC address for ethernet adapter
- Replace FlOPPY_PATH with Virtual floppy path if you are using Activation Engine

- Define Virtual HMC using edited domain.xml
Command: virsh define domain.xml - Verify that Virtual HMC was added to the list of defined VMs.
Command: virsh list --all

- Start Virtual HMC defined by the domain.xml (Use the name in <name>NAME<name> tag )
Command: virsh start <name>
- Create a folder to store Virtual HMC Components.
- Copy the Virtual HMC Tar file into the folder.
- Extract the Virtual HMC file into the folder.
- The following files should be displayed:
- README.txt
- vHMC-Conf.xml
- disk1.img
- checksum
- domain.xml
- Open domain.xml with a text editor
- Edit the following values:
- Change the name of the Virtual HMC(Optional)
- Change machine type to pc-i440fx-trusty

- Change the Emulator value to /usr/bin/kvm-spice

- Replace DISK_PATH with the path for disk1.img
- Replace MAC_ADDRESS with a MAC address for ethernet adapter
- Replace FlOPPY_PATH with Virtual floppy path if you are using Activation Engine
- Define Virtual HMC using edited domain.xml
Command: virsh define domain.xml - Verify that Virtual HMC was added to the list of defined VMs.
Command: virsh list --all
- Start Virtual HMC defined by the domain.xml (Use the name in <name>NAME<name> tag )
Command: virsh start <name>
Virtual Machine Manager is a Graphical User Interface for creating and managing guest virtual machines.
The following procedure displays how to deploy Virtual HMC using Virtual Machine Manager:
Note: Virt-manager packages are required to use Virtual Manager.
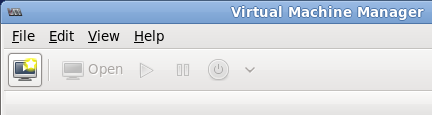
Launch Virtual Machine Manager from
Applications menu and
System Tools sub-menu or
by command line using virt-manager command (Root privileges are needed).
Click the Create a new virtual machine button.
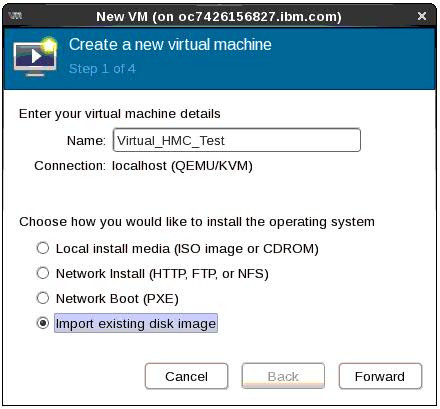
Enter a Name for the new HMC virtual machine.
Select Import existing disk image.
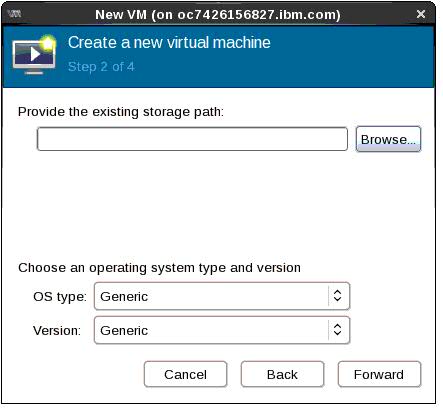
- Click browse
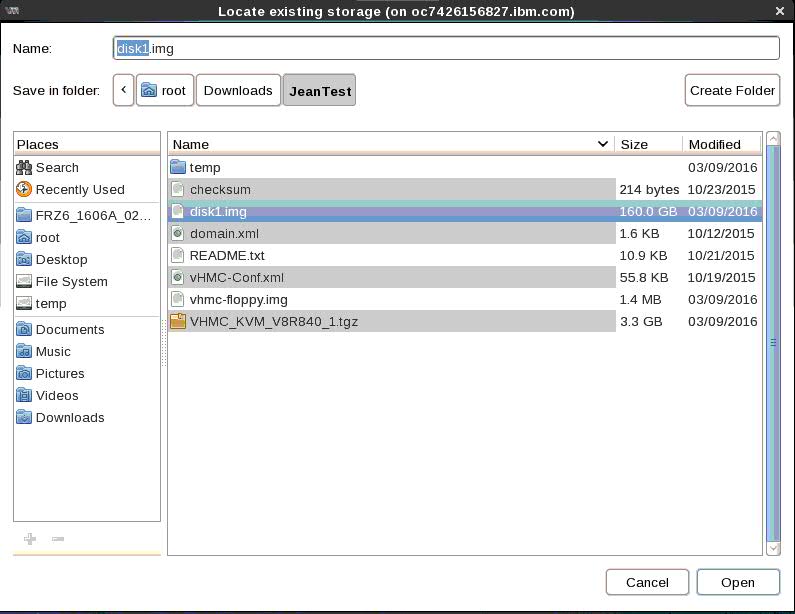
- Specify the Virtual HMC disk1.img
path
- Select Linux OS type and Red Hat
Enterprise 6 or above
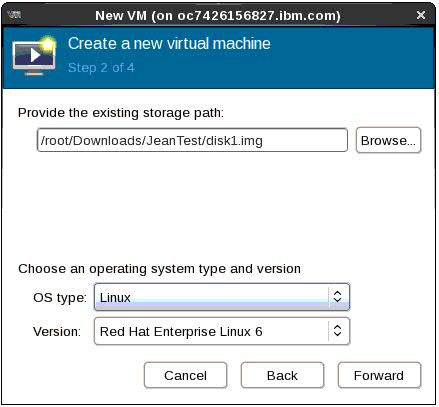
Select RAM memory and
CPUs
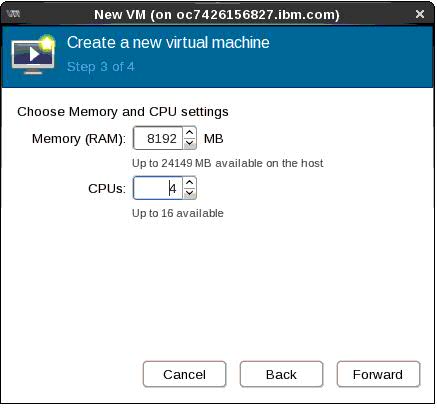
Note: Virtual HMC Minimum requirements are 8GB ram and 4 CPUs
Select Host Host device for Virtual HMC
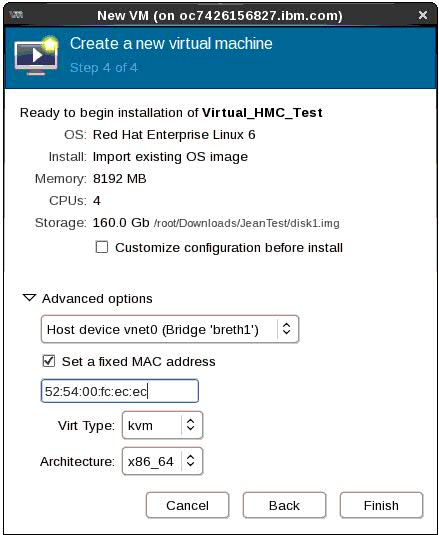
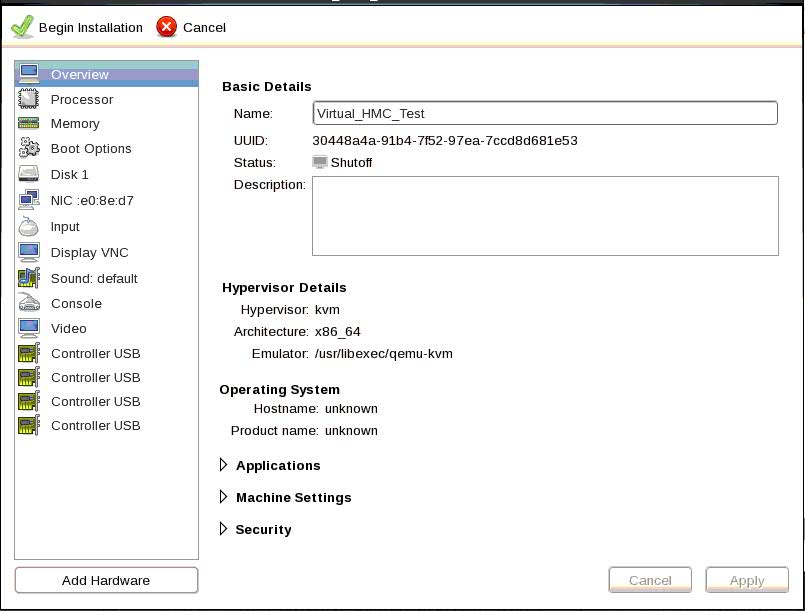
- Select Custimize configuration before install

- Configuration Settings