

| Hitachi Data Systems Hitachi, Ltd. | |
|
|
|
Installing Remote Access Control CenterInstallation is a simple procedure. If the media you have is a CD, just insert it into the computer�s CD drive and the installation menu should appear. If your media is other than a CD or if the installation menu does not appear automatically, just double-click the Setup.exe file on the root of the media.
The next item on the installation menu is Install F5 components. Click this menu item to run the F5 software installer. Follow the directions in this installer to complete the installation of the F5 components. The next item on the installation menu is Install Hi-Track RACC. Click this item to run the RACC software installation program. While this installer is running, you may be presented with additional installers for required prerequisite components. Install all of the components suggested by following the directions in these installers. Also, the installer will prompt you to select the installation folder. The default folder is: C:\Program Files\Hitachi Data Systems\Hi-Track RACC\ After installing the Hi-Track RACC application, click the link labeled Launch the Hi-Track RACC application. This will open your web browser and bring up the RACC application. Close the installation menu by clicking the link labeled Exit. Upgrading Remote Access Control CenterIf a previous version of the Hi-Track RACC application is installed on the host system, you need to remove it by using the Add/Remove Programs tool before installing the latest version. Please note that you do not need to remove the F5 VPN components or the Cassini web server as they are not affected by the upgrade. |
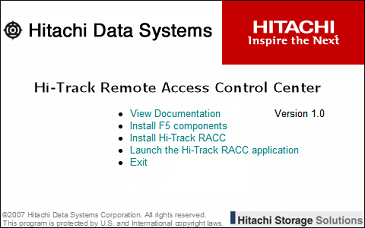 The first item on the installation menu is View Documentation.
Here you can find the readme page, release notes, and these help pages for using
Hi-Track RACC.
The first item on the installation menu is View Documentation.
Here you can find the readme page, release notes, and these help pages for using
Hi-Track RACC.